Changing image appearance#
Switching LUTs#
You can change the colors of the LUT by selecting an alternative option from the Image –> Lookup tables submenu.
Use the Control Panel to frequently access the same menu: If you want to explore LUTs quickly, use Plugins –> Utilities –> Control Panel. This opens a window that allows you to double-click on commands from any menu or submenu to apply that command quickly.
Adjusting Brightness & Contrast#

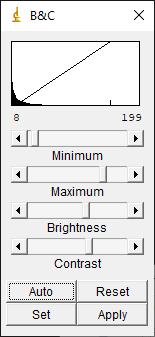
The main command to change the brightness of an image is Image –> Adjust –> Brightness/Contrast... Since you’re likely to use it a lot, it is worth learning the shortcut: Shift + C.
The Brightness/Contrast dialog has four sliders: Minimum, Maximum, Brightness & Contrast. They are linked together: changing either of the first two also results in a change to the last two, and vice versa.
Supposing you have a grayscale LUT, with colors ranging from black to white, you should see that
All pixels with a value less than or equal to the Minimum will be shown as black
All pixels with a value greater than or equal to the Maximum will be shown as white
All other pixels with a value in between will be shown using a shade of gray
Use the minimum & maximum sliders: Despite the name of the command implying Brightness and Contrast are the star performers, I would argue that the Minimum and Maximum sliders are far more intuitive.
I use Minimum and Maximum almost exclusively.